Analog Film Effect in Photos: How to Create a Film Aesthetic Online (2026)
Add film grain, vignette, faded colors and the charm of analog cameras to your digital photos — directly in your browser, for free, no software needed.
By Bruno Dissenha — Developer and creator of PhotoEditor.Studio. Bruno built this platform after failing to find a genuinely free, private photo editor with no hidden strings. He writes about photo editing to help the same people the tool was built for.
Published: May 5, 2026 · Updated: May 5, 2026
"A technically perfect photo has no soul. A photo with film grain has a story."
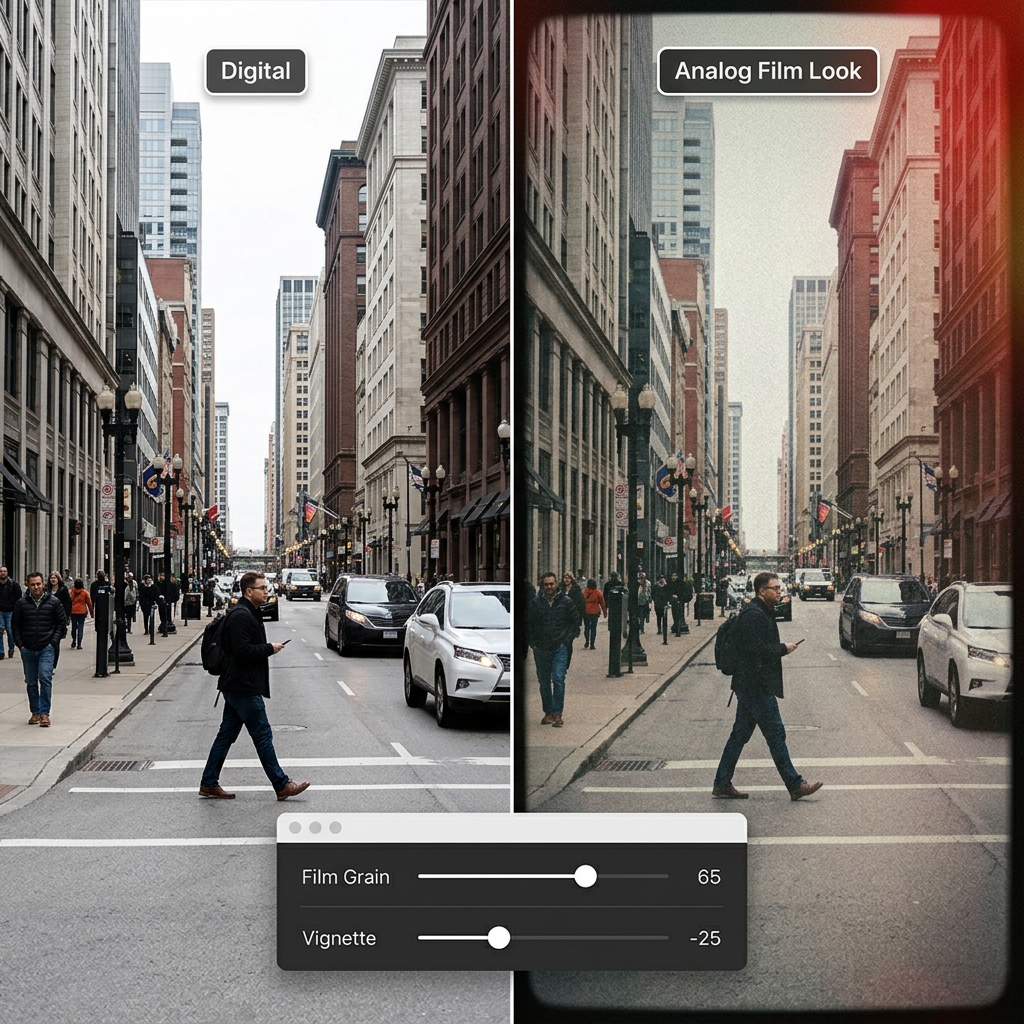
Table of Contents
What Is the Analog Aesthetic in Digital Photos?
The analog aesthetic — also called the film look, film aesthetic, or vintage look — is the set of visual characteristics that evoke the appearance of photos taken with film cameras before the digital era. Visible grain, slightly faded colors, shadows that never reach pure black, vignetting at the edges, light leaks, and a color temperature that is never completely neutral — these are the elements that define this style.
When applied to digital photos, the analog effect works as an aesthetic translation: it takes the sharpness and technical cleanliness of digital and adds calculated imperfections that make the image more human, more artistic, and paradoxically more interesting to look at than a perfectly sharp and correctly exposed photo.
PhotoEditor.Studio provides the tools needed to create this effect with precision and control — film grain, vignette, analog filters, and HSL color control — all directly in your browser, with nothing to install and nothing to pay for.
Why Is the Film Aesthetic So Popular Right Now?
We're living in a paradoxical moment in photography. Camera technology has never been more technically perfect — modern smartphones capture images with resolution and sharpness that would have been considered professional-grade a decade ago. And it's precisely that technical perfection that's triggering an aesthetic reaction: people are saturated with perfectly sharp, perfectly exposed, and perfectly characterless photos.
The analog aesthetic responds to that. It reintroduces the human imperfections of film photography: the grain that appears in the shadows, the subtle color shift that different film stocks created, the edge darkening that older lenses produced. These imperfections aren't bugs — they're visual features. They're what separates a photo with personality from a photo that could have been taken by anyone with any phone.
On Instagram, TikTok, and Pinterest, content with a consistent film aesthetic consistently outperforms hyper-sharp and over-saturated content in engagement. Fashion photographers, travel content creators, portrait photographers, and street photographers have adopted the analog look as their central visual language. And interest keeps growing — Google Trends shows consistent growth in searches for "film look," "analog photography aesthetic," and "vintage photo filter" over the past three years.
For digital photographers and content creators, knowing how to create this effect in a controlled and consistent way is today as relevant a skill as knowing how to adjust exposure or frame a portrait.
The Elements That Define the Analog Look
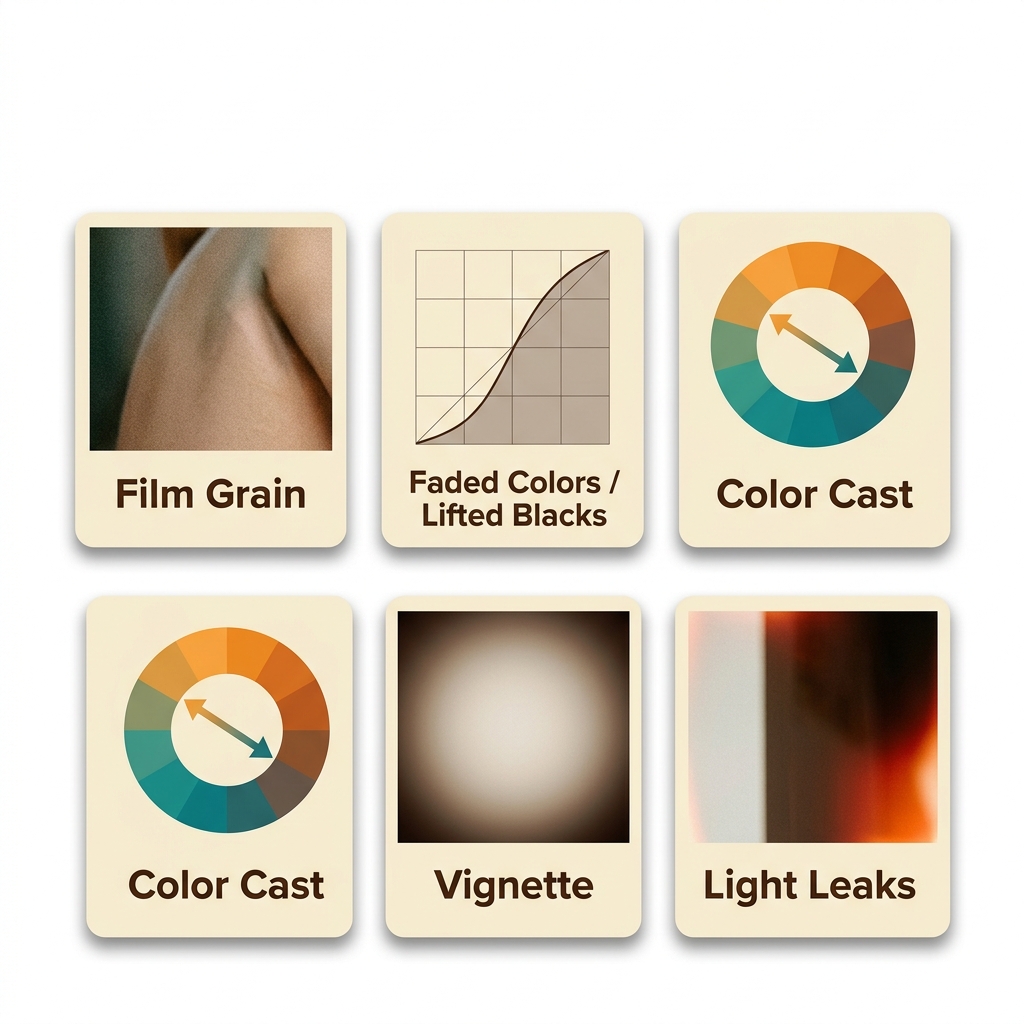
The analog effect isn't a single adjustment — it's a combination of visual elements that, together, create the impression of a photo taken on film. Understanding each one allows you to control the result with precision:
Film Grain
The most recognizable element of the analog aesthetic. Grain is produced by the silver halide crystals in photographic film — and the more sensitive the film (higher ISO), the more visible the grain. In digital, grain is simulated by adding a texture-based noise to the image.
Good film grain doesn't look identical to digital noise — it has a more organic, slightly irregular texture that distributes differently in shadows and highlights. In PhotoEditor.Studio, the film grain slider simulates this texture in a softer, more cinematic way than the digital noise that naturally appears in low-light photos.
Typical intensity: 40 to 70 on the slider for a believable effect. Above 80, the grain starts to look more like digital noise than analog film.
Lifted Blacks (Faded Look)
One of the most recognizable characteristics of the film look is that the blacks never reach pure black. Photographic films have a "base fog" — a minimum exposure layer that prevents the shadows from being completely devoid of detail. The result is a slightly faded appearance, with shadows sitting at dark gray rather than pure black.
To replicate this in PhotoEditor.Studio, use the Shadows control to lift the blacks (value between +20 and +40) combined with a slight reduction in Contrast. The effect is subtle but fundamental to making the image look genuinely analog and not just "filtered."
Color Cast
Each photographic film had its own color signature. Kodak Gold had a warm, yellow-amber cast. Fuji Superia had cooler, greener tones. Kodak Portra was neutral with a very slight pinkish-cream lean. Expired film produced completely unpredictable colors.
In PhotoEditor.Studio, this signature is created through the HSL panel: warming the Orange and Yellow tones to simulate Kodak Gold, cooling the Blue and Green tones to simulate Japanese emulsions, or creating more dramatic color shifts for the expired film effect.
Vignette
The vignette — subtle darkening of the image edges — was a natural optical characteristic of older lenses, especially at maximum aperture. In the analog context, the vignette should not be exaggerated or too circular — it should feel natural, as if it came from the lens optics, not as if it was "pasted" onto the image in post.
In PhotoEditor.Studio, use the Vignette control with values between -15 and -30 for a believable analog vignette. More than -35 starts to look overdone for most photos.
Light Leaks
Light leaks were imperfections in analog cameras — light that entered through the camera body and marked the film, creating warm patches of orange, red, or yellow at the edges or in specific regions of the image. Today they're used intentionally as an aesthetic element.
In PhotoEditor.Studio, this effect can be approximated through Brightness adjustments and the HSL panel — adding warmth and saturation to a specific region by adjusting the Orange and Red color channels. For a more complete light leak effect, the editor's analog filter includes variations with this characteristic already incorporated.
How to Create the Analog Effect in PhotoEditor.Studio: Step by Step
Step 1: Import Your Photo and Prepare the Base
Go to PhotoEditor.Studio and import your image:
- Drag and drop the file directly onto the editor area
- Click "Select Images" to open your file browser
- Supports JPEG, PNG, WEBP, and GIF
Before adding the analog effect, make sure the photo's lighting is balanced. The analog effect works on top of the base image — a very dark photo with analog effect applied will become too dark; an overexposed photo will lose even more highlight detail.
💡 Tip: If the photo needs lighting correction, do that first with the Brightness, Contrast, and Shadows controls. See our brightness and contrast adjustment guide for a solid technical base before applying the aesthetic effect.
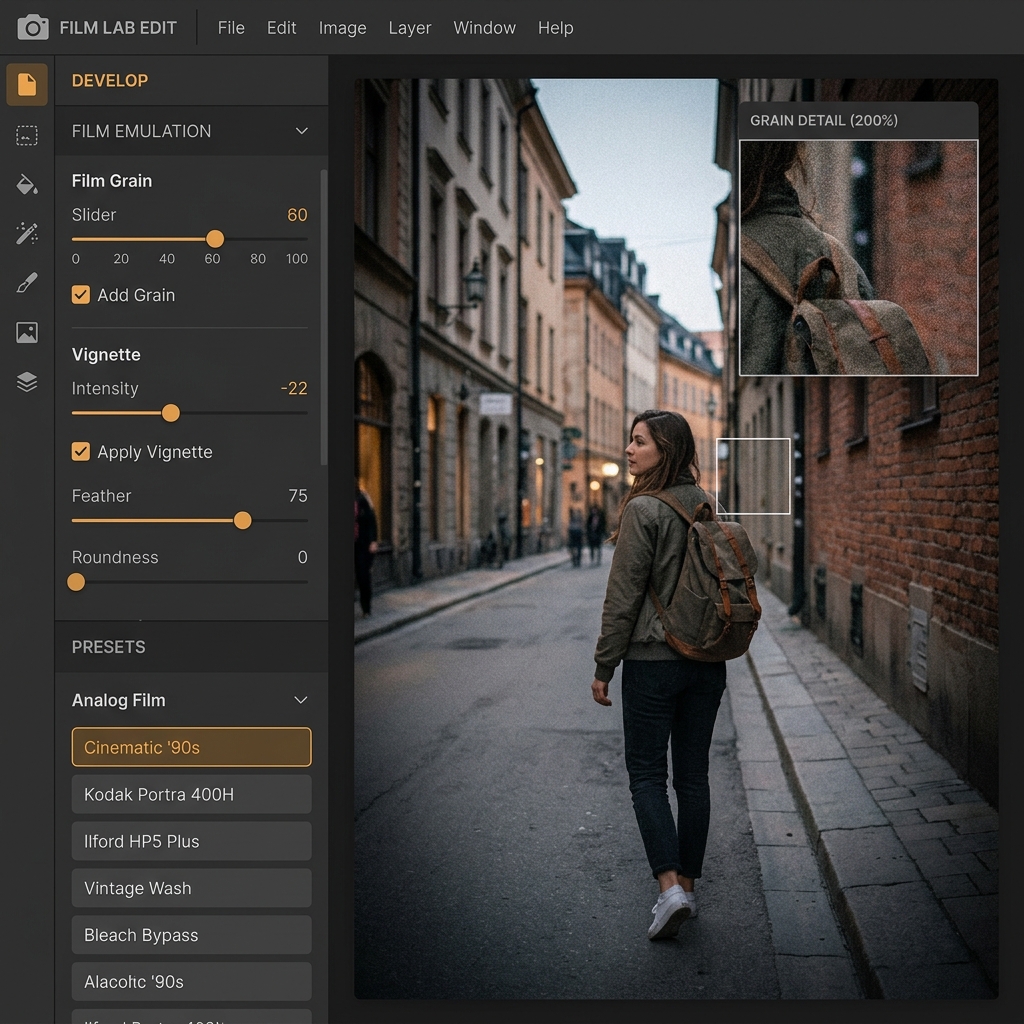
Step 2: Add the Film Grain
In the left-hand panel, find the "Analog Effect" or "Film Grain" section. Drag the slider to set the grain intensity:
- 20 to 40: subtle grain — barely visible at normal view, but present when zoomed in. Ideal for those who want a discreet analog touch without compromising the general look of the image.
- 40 to 65: moderate grain — visible but not dominant. The sweet spot for most analog aesthetic photos. The texture is present without drawing more attention than the subject.
- 65 to 85: heavy grain — pronounced and unmistakable. Ideal for street photography, documentary photography, and any image where the film effect is the central visual element.
- 85 to 100: extreme grain — for deliberately artistic effects, simulation of very grainy film (ISO 3200 or above), or to create the texture of expired or damaged film.
💡 Important: evaluate the grain with the photo at normal viewing size (not zoomed in). Grain that looks excessive at 200% zoom may look perfect at normal view.
Step 3: Lift the Blacks for the Faded Effect
This is the step that most differentiates a believable analog effect from a simple Instagram filter. In the lighting panel, adjust:
- Shadows: increase to +20 to +35 — this lifts the shadows from pure black to the dark gray characteristic of photographic film
- Contrast: reduce slightly, between -5 and -15 — to soften the difference between lights and shadows, creating the flatter, more faded look of film
This combination — lifted shadows + reduced contrast — is what creates the faded look characteristic of analog photography. Without it, the grain effect just looks like a photo with noise.
Step 4: Create the Color Cast with HSL
Open the HSL panel and adjust the color channels to simulate the color signature of the film stock you want to replicate:
For warm tone (Kodak Gold / Portra style):
- Orange channel: Saturation +10 to +15, Hue +3 to +5 (more amber)
- Yellow channel: Saturation +8 to +12
- Blue channel: Luminance +5 to +10 (lifts blues in the shadows)
For cool/neutral tone (Fuji Superia / Velvia style):
- Green channel: Saturation +10 to +20 (more vivacity in cool colors)
- Blue channel: Saturation +10 to +15, Hue -5 (more blue-green)
- Orange channel: Saturation -5 to -10 (reduces warmth in skin tones)
For expired film:
- Orange channel: Hue +10 to +20 (shift toward red)
- Green channel: Hue -10 to -15 (green toward cyan)
- Yellow channel: Saturation +20 to +30 (intense yellow)
- Shadows: +30 to +45 (very lifted blacks, almost completely faded)
To learn more about precise HSL control, see the complete HSL guide.
Step 5: Add the Vignette
In the Vignette panel, set the intensity between -15 and -30 for a subtle darkening of the edges. The analog vignette should look like it came from the camera's optics — gradual and soft — not like a dark circle overlaid on the image.
For a stronger, more dramatic effect (Polaroid or Lomo camera style), values between -30 and -45 can be used.
Step 6: Apply an Analog Filter (optional)
To speed up the process, you can use one of the editor's analog or cinematic filters as a starting point and adjust the other controls on top. Filters work well as a base — especially those in the vintage and cinematic style.
Apply the filter at 50 to 70% intensity and then make manual adjustments to grain, vignette, and HSL on top to personalize the result.
Step 7: Export Without Watermarks
When the effect is exactly how you want it:
- Click "Export"
- Choose your format: JPEG for social media, PNG for maximum quality, WEBP for web
- The file downloads directly — no watermark, no upload, no waiting
Analog Aesthetic Styles and How to Recreate Them
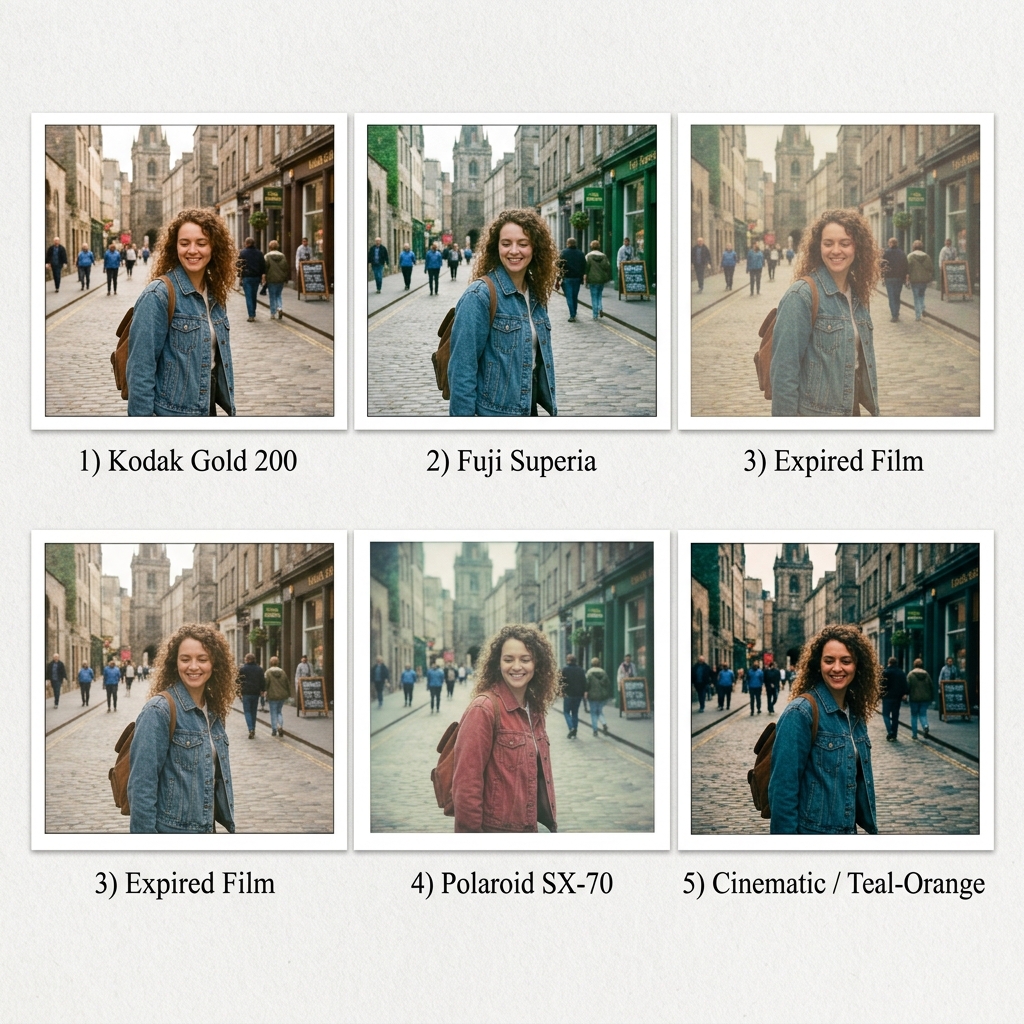
Each analog style has its specific combination of adjustments. Here are the recipes for the most popular ones in PhotoEditor.Studio:
Kodak Gold 200 — Warm and Creamy
The most recognizable look of domestic analog photography from the 1980s and 90s. Warm, lightly saturated, with creamy highlights and a golden cast in the midtones.
- Film grain: 35 to 50
- Shadows: +15 to +25
- Contrast: -5 to -10
- HSL Orange: Saturation +12, Hue +4
- HSL Yellow: Saturation +10
- HSL Blue: Luminance +8
- Vignette: -15 to -20
Fuji Superia / Fuji 400H — Cool, Natural and Rich Greens
The Japanese counterpoint to Kodak. Cooler tones, more vivid greens, less skin color — a cleaner and more contemporary look within the analog aesthetic.
- Film grain: 30 to 45
- Shadows: +10 to +20
- Contrast: -5
- HSL Green: Saturation +15, Hue -5
- HSL Blue: Saturation +12, Hue -5
- HSL Orange: Saturation -8
- Vignette: -10 to -15
Expired Film — Faded, Surreal and Unpredictable
The most artistic and deliberately imperfect look. Shifted colors, very lifted blacks, heavy grain — it looks like the photo was taken on a roll of film forgotten in a box for 10 years.
- Film grain: 65 to 85
- Shadows: +35 to +50
- Contrast: -15 to -25
- HSL Orange: Hue +15 to +25, Saturation +20
- HSL Green: Hue -12, Saturation +15
- HSL Yellow: Saturation +25
- Vignette: -25 to -35
Polaroid SX-70 — Pastel, Soft and Nostalgic
The unmistakable look of the iconic instant camera. Low contrast, pastel colors, greenish shadows, heavy vignette, and a dreamy, slightly soft quality.
- Film grain: 25 to 40
- Shadows: +30 to +40
- Contrast: -20 to -30
- Brightness: +10
- HSL Green: Hue +8, Saturation +10 (greenish shadows)
- HSL Red: Saturation -15 (faded reds)
- Vignette: -30 to -40
Cinematic Teal-Orange — Modern and Dramatic
Not analog in the historical sense, but the grain aesthetic most used in modern cinema and in high-production fashion and travel content. Cyan-green shadows, warm highlights, strong contrast.
- Film grain: 40 to 55
- Contrast: +15 to +20
- HSL Blue: Hue -10 (shadows toward cyan), Saturation +20
- HSL Orange: Saturation +20, Hue +5 (warm highlights)
- HSL Green: Hue -8, Saturation +15
- Vignette: -15 to -20
Tips by Photography Type
Portraits with Analog Aesthetic
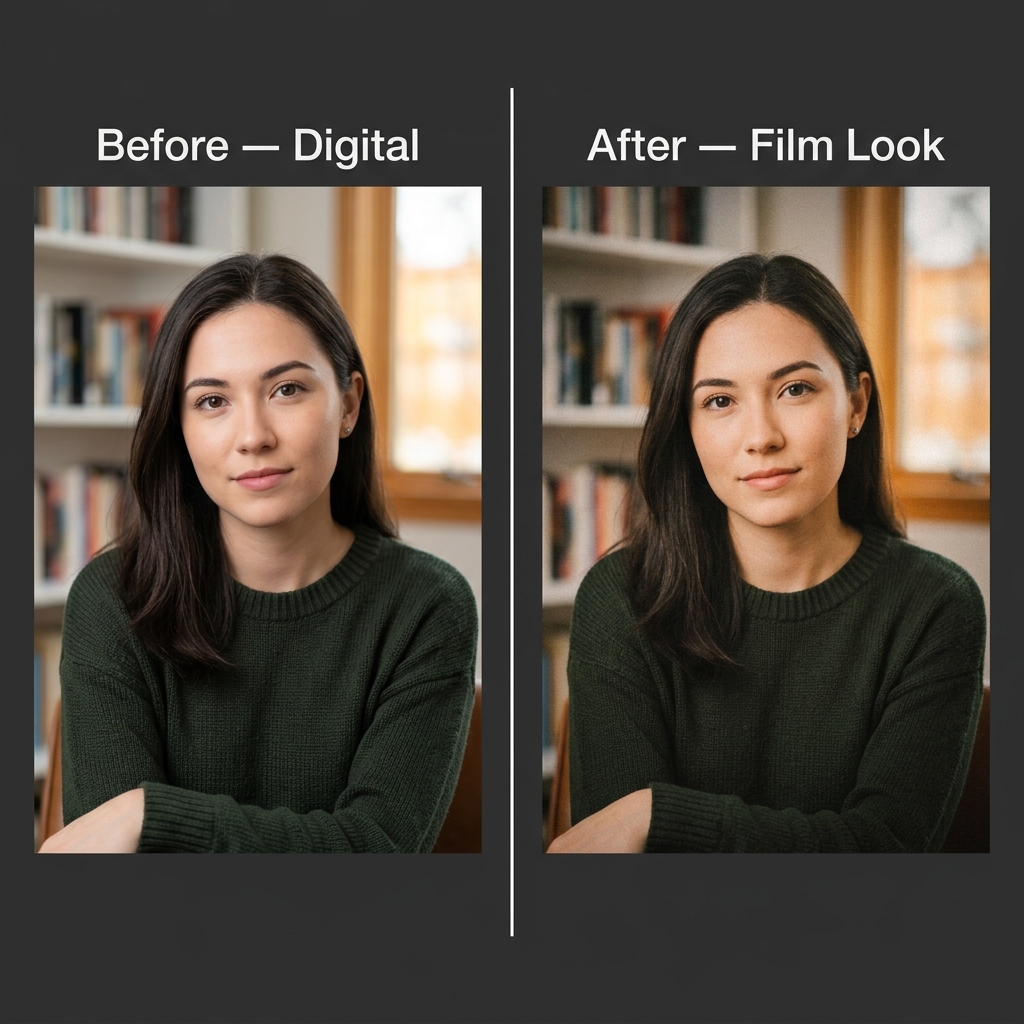
For portraits, the key is subtlety. Excessive grain in a close-up of a face becomes disturbing — the grain texture competes with the skin texture. Recommendations:
- Grain: keep between 30 and 50 for portraits — present but not dominant
- HSL Orange: careful adjustment — any overreach destroys the skin tone
- Lifted shadows: essential for creating that ethereal, dreamy quality in analog portraits
- Moderate vignette: -15 to -22 to guide the eye to the face without overdoing it
- Recommended base filter: Kodak Gold for warm skin tones, Fuji 400H for neutral/cool skin
Quick recipe for portrait:
Grain 40 + Shadows +20 + Contrast -8 + HSL Orange Sat +10 + Vignette -18
Analog Street Photography
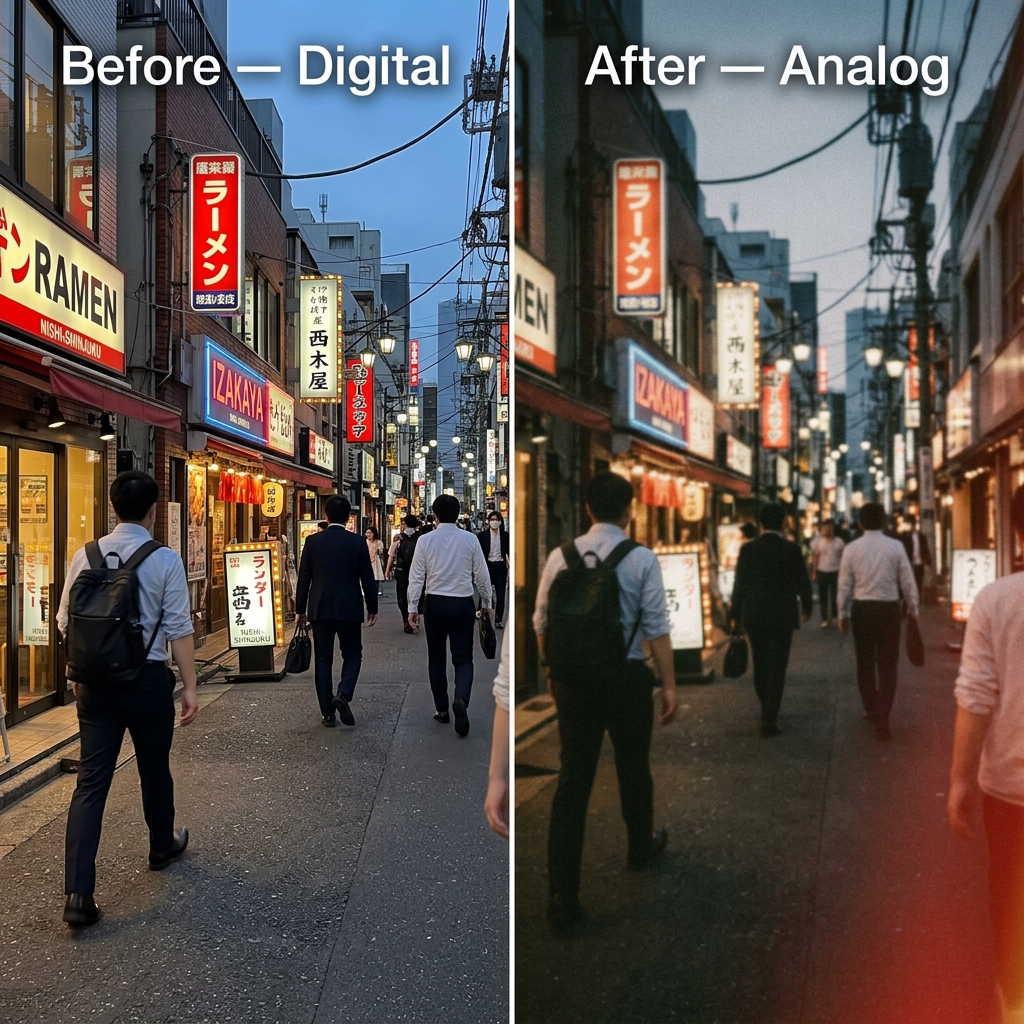
Street photography is where the analog effect shines brightest. Grain adds texture to the urban scene; faded colors create timelessness; vignette focuses the eye on the subject amid the chaos of the street.
- Grain: can be heavier — 55 to 75 for a more documentary look
- Contrast: keep moderate — +10 to +15 to create presence without losing shadow detail
- Shadows: lift +15 to +25 to preserve texture in urban shadows
- HSL: more pronounced color shift — the expired film look works very well for street
- Recommended filter: Kodak Tri-X (B&W) or Expired Film for color
Quick recipe for street:
Grain 65 + Shadows +20 + Contrast +10 + Vignette -25 + HSL Orange Sat +15 + HSL Blue Lum -10
Travel Photography with Film Aesthetic
Landscapes and travel scenes with analog aesthetic evoke old photo albums and postcards from the 1970s and 80s. The key is the warm color palette and lightness in the shadows.
- Grain: 35 to 55 — present but not the star of the image
- Sky: use HSL Blue carefully — saturate moderately (+20 to +30) and slightly lift the luminance for a more "filmic" and less digital blue
- Vegetation: adjust HSL Green and Yellow toward more natural, less saturated tones — analog photography doesn't have the vivacity of digital
- Shadows: +20 to +30 for the characteristic faded look
- Recommended filter: Kodak Ektar for landscapes with vivid colors, Fuji Velvia for dense nature
Common Mistakes When Creating the Analog Effect
Over-doing the Grain
The most frequent mistake. When the grain is excessive, the image simply looks noisy — like a photo taken in the dark with a smartphone, not like a film photograph. Believable analog grain exists but doesn't dominate. If the first thought when seeing the image is "what ugly noise," the effect has failed.
Solution: start at 35 to 45 and increase gradually. Always evaluate with the photo at normal viewing size, not zoomed in.
Adding Grain Without Lifting the Blacks
Grain without the faded look (lifted shadows) is digital noise with a filter. The combination of both elements — grain plus lifted blacks — is what creates the genuinely analog appearance. Without lifting the shadows, the effect looks applied on top rather than intrinsic to the photo.
Solution: always combine grain + Shadows +15 to +30 + Contrast -5 to -15 as the minimum base of the effect.
Using Global Saturation Instead of HSL
The temptation is to increase global saturation to create more "analog-looking" colors. But analog isn't about more saturation — it's about different saturation. Photographic films had color channels with different responses: some amplified the red, others the yellow-green. HSL is the right tool for this.
Solution: use the HSL panel to create the specific color signature of the desired analog style. Global saturation, if used, should be moderate — between -5 and +10.
Vignette Too Circular
A very circular and very dark vignette looks like an obvious editing effect, not an analog optical effect. The analog vignette is subtle, organic, and gradual.
Solution: keep the vignette between -15 and -30 for most photos. Assess whether the vignette looks like part of the photo or like an overlaid element — if it looks overlaid, reduce the intensity.
Applying the Effect on Photos with Poor Lighting
The analog effect doesn't fix lighting problems — it amplifies them. A very dark photo with film grain will be dark and grainy in a way that doesn't look analog: it just looks like a bad photo. The same goes for overexposed photos.
Solution: correct the base lighting before applying the analog effect. The brightness and contrast guide and the noise reduction guide are the right starting points.
Supported Export Formats
PhotoEditor.Studio accepts and exports the main image formats:
PhotoEditor.Studio vs Other Tools (Analog Effect)
| Feature | PhotoEditor.Studio | VSCO | Lightroom | Afterlight |
|---|---|---|---|---|
| 100% Free | ✅ Always | ⚠️ Freemium | ❌ Subscription | ⚠️ Freemium |
| Film Grain | ✅ Included | ✅ Included | ✅ Included | ✅ Included |
| HSL Panel (8 channels) | ✅ Full | ⚠️ Limited | ✅ Advanced | ⚠️ Partial |
| No Installation | ✅ Browser | ❌ App | ❌ Desktop/app | ❌ App |
| Local Privacy | ✅ Full | ❌ Upload | ⚠️ Cloud | ❌ Upload |
| Batch Editing | ✅ Free | ❌ No | ✅ Paid | ❌ No |
| No Sign-up | ✅ None needed | ❌ Required | ❌ Required | ❌ Required |
Frequently Asked Questions About the Analog Film Effect
Does the analog effect reduce photo quality?
Film grain adds texture to the image, which technically increases visual complexity. In terms of perceived quality, the result depends on the intensity used: moderate grain (30 to 55) doesn't reduce perceived quality — on the contrary, it can increase the visual richness of the image. Excessive grain (80+) can make the photo look like it's low quality. Use it with judgment.
What's the difference between PhotoEditor.Studio's film grain and regular digital noise?
Digital noise appears naturally in photos taken in low light and has a random, electronic texture — isolated red, green, and blue pixels with no coherent pattern. The editor's film grain effect simulates the organic texture of silver halide crystals — a more uniform, slightly softer granulation that distributes differently in lights and shadows. The result looks analog, not like a nighttime smartphone photo.
Can I combine the analog effect with other editor adjustments?
Yes, and that's exactly what produces the best results. The recommended flow is: lighting correction (brightness, contrast, shadows) → color grading with HSL → film grain and vignette application → optional analog filter. Each layer of adjustment contributes to the final result.
Does the effect work better in black and white or in color?
Both work very well, but for different reasons. In black and white, film grain creates the classic texture of documentary and journalistic photography — timeless and powerful. In color, the analog effect allows you to create unique color signatures that evoke different film stocks. Try both and see which one best fits the subject of the photo.
Can I apply the analog effect to multiple photos at the same time?
Yes. PhotoEditor.Studio has batch editing mode — you configure all the analog adjustments (grain, vignette, HSL, filter) once and apply them to a set of photos simultaneously. Ideal for complete photography sessions with consistent aesthetic. See the batch photo editing guide for the full process.
Does the analog effect work well for any type of photo?
It works for almost any type, but works best on photos with clear subjects and good base lighting. Street photography, portraits, travel, and landscape are the genres where the effect most amplifies the result. Product photos for e-commerce generally don't benefit from the analog effect — they need color accuracy, not vintage aesthetic.
Ready to Give Your Digital Photos an Analog Soul?
Try PhotoEditor.Studio's film grain, vignette and analog filters now — free, directly in your browser, nothing to install.
Open Free Photo Editor →