How to Edit Photos for Instagram and Social Media: Complete Guide 2026
Learn how to edit photos for Instagram, TikTok, Pinterest and other platforms. Sizes, ratios, filters and editing tips for feed, stories and reels — all free and online.

Table of Contents
Why Editing Matters on Social Media
Social media is a visual medium. On Instagram, TikTok, and Pinterest, the first fraction of a second determines whether someone stops to look at your content or keeps scrolling. Poorly framed photos, flat colors, or wrong crop ratios are automatically ignored — no matter how good the actual content is.
Editing photos for social media isn't about creating fake or unrealistic images. It's about presenting what you want to show in the most compelling way possible: with the right framing, colors at the ideal intensity, and a visual identity that's recognizable across every post.
With PhotoEditor.Studio, you do all of this directly in your browser — 100% free, no installation required, and with complete privacy: no photo is ever uploaded to an external server.
Image Sizes and Ratios by Platform in 2026
Every platform has different specs. Using the wrong ratio means the platform will automatically crop your photo — often removing exactly the most important part of the image.

| Format | Ratio | Ideal Size | Notes |
|---|---|---|---|
| Feed Square | 1:1 | 1080×1080px | Classic, consistent grid look |
| Feed Portrait | 4:5 | 1080×1350px | Recommended — largest screen area |
| Stories | 9:16 | 1080×1920px | Full-screen vertical |
| Reels (thumbnail) | 9:16 | 1080×1920px | Same as Stories |
| IGTV / Channel Cover | 1:1 | 420×654px | Channel page cover |
💡 Tip: The 4:5 portrait format is the most strategic choice for your Instagram feed. It takes up the largest possible area on a mobile screen, increasing visibility without any algorithmic penalty.
TikTok
| Format | Ratio | Ideal Size |
|---|---|---|
| Video / Thumbnail | 9:16 | 1080×1920px |
| Profile photo | 1:1 | 200×200px |
| Format | Ratio | Ideal Size |
|---|---|---|
| Standard pin | 2:3 | 1000×1500px |
| Square pin | 1:1 | 1000×1000px |
| Long pin | 1:2.1 | 1000×2100px |
Facebook and LinkedIn
| Format | Ratio | Ideal Size |
|---|---|---|
| Post with image | 1.91:1 | 1200×630px |
| Stories | 9:16 | 1080×1920px |
| Cover photo | 16:9 | 820×312px |
How to Edit Photos for Social Media: Step by Step
Step 1: Import Your Photo Into the Editor
Go to PhotoEditor.Studio and import your image:
- Drag and drop the file directly onto the editor area
- Click "Select Images" to open your file browser
- Supports JPEG, PNG, WEBP, and GIF
Your photo opens on the canvas at its original resolution. The editor doesn't alter or compress the image during import.
💡 Tip: For efficiency, use batch editing when you need to prepare multiple photos from the same shoot or session. Learn more in our batch photo editing guide.
Step 2: Crop to the Right Ratio for Your Platform
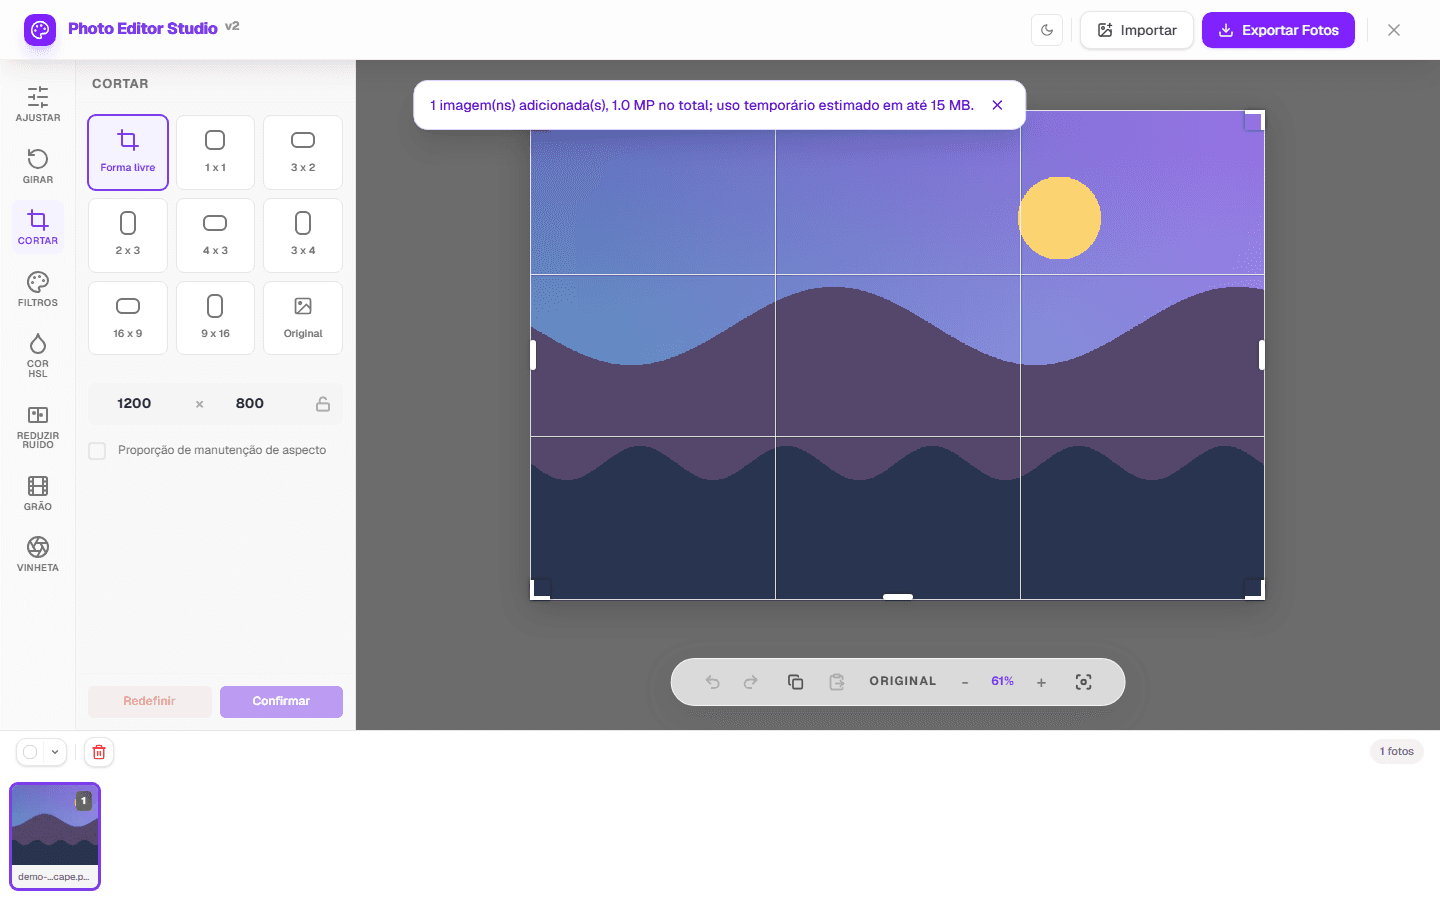
This is the most critical step. In the left-hand panel, open the "Crop & Frame" tool and select the ratio for your platform:

- Instagram Feed: select 4:5 (portrait) or 1:1 (square)
- Instagram Stories / Reels / TikTok: select 9:16
- Pinterest: select 2:3
- Facebook / LinkedIn: select 1.91:1 or use a custom ratio
After selecting the ratio, reposition the crop frame so your main subject is well-composed and centered. Use the rule of thirds as a guide — place key elements along the grid lines or at their intersections.
For a deep dive on cropping, see our complete guide on how to crop photos online.
Step 3: Adjust Brightness, Contrast and Exposure
Smartphone photos taken indoors or under artificial light often come out dark or flat. In the editing panel:
- Raise brightness to open up the scene — avoid going past +30 to preserve highlights
- Adjust contrast to add depth — a value between +10 and +25 works well for most social media photos
- Use shadows and highlights separately for more precise control: lift shadows to reveal dark details without brightening the entire image
Step 4: Correct and Boost Colors
Color is the most visually impactful element in a social media photo. Use the color panel to:
- Saturation: boosts intensity across all colors at once. A value of +10 to +20 is enough for most photos — more than that starts to look unnatural.
- Vibrance: similar to saturation but smarter. It primarily boosts less saturated colors while protecting skin tones. Prefer vibrance over saturation for photos with people.
- White balance: if the photo looks too yellow (incandescent light) or too blue (shade), adjust the color temperature to correct it. Slightly warm (golden) tones tend to perform better for lifestyle content.
- HSL panel: for surgical adjustments — boost just the blue of the sky without touching the green of plants, or subtly shift a skin tone without affecting the rest of the image.
Step 5: Apply a Filter (In Moderation)

Filters are powerful visual shortcuts — but overdoing it backfires. The golden rule: the filter should never draw more attention than the content of the photo itself.
Pick a style and apply it at moderate intensity (50–70% of the maximum effect). The most-used styles on Instagram in 2026:
- Warm / Golden Hour: perfect for lifestyle, travel and food. Lifts shadows to amber tones, adds warmth and vibrancy.
- Cinematic / Moody: high contrast, deep shadows, teal-and-orange split tone. Works very well for urban photography and dramatic portraits.
- Light & Airy: high exposure, lifted shadows, near-blown whites. Widely used in fashion, maternity, and flat-lay photography.
- Black & White: timeless. Works for portraits, architecture, street photography, and any scene with naturally strong contrast.
Step 6: Reduce Noise (if needed)
Photos taken at night, in restaurants, or at concerts often have visible digital grain — especially on older phones. Before exporting, check whether your photo needs noise reduction.
In the sidebar, find the "Noise Reduction" section and apply an intensity between 30 and 60 for most cases. For a complete walkthrough, see our guide to reducing noise in photos.
Step 7: Export in the Right Format
When the edit is done:
- Click "Export"
- Choose your format:
- JPEG for most photos (smaller file, good quality)
- WEBP for websites or platforms that support the format
- PNG only when transparency is needed (rarely required for social media)
The file downloads directly — no watermark, no server upload
Filters and Styles: Choosing the Right Look for Your Feed
The right filter isn't the one that looks most impressive on a single photo — it's the one that fits alongside your other posts and communicates your personal or brand identity.
Some practical guidelines:
- Pick 1 or 2 styles and stick with them. A feed with consistently warm tones is more recognizable and professional than one with a mix of styles. Visual consistency is what makes a profile look intentional and curated.
- Set the intensity lower than you think you need. Filters look fine at full strength on an isolated photo, but when you see the full feed, they can feel overwhelming. Start at 50–60% of maximum intensity.
- Match the style to the subject. Warm, golden tones work for food and travel. Cool, cinematic tones work for fashion and architecture. Neutral, bright tones work for products and flat lay.
- Always preview in context. Before posting, place the photo next to your last 6–9 published posts and assess whether the combination makes visual sense.
How to Keep a Consistent Visual Feed

Consistency doesn't mean monotony. It means someone visiting your profile can immediately recognize your visual style — by the color palette, the overall brightness, the type of filter.
How to build and maintain visual consistency:
- Define your palette: choose 2–3 dominant colors that will appear across most of your photos. If you shoot outdoor lifestyle content, shades of green, beige, and soft blue form a natural, cohesive palette.
- Note your editing values: write down or remember the slider values you used on a photo that came out exactly as you wanted. Use those as your starting point every time.
- Use batch editing for full sessions: when you shoot multiple photos in the same session (same time of day, same lighting conditions), edit one as your reference and apply the same adjustments to the rest in batch mode.
- Evaluate the full feed, not just individual photos: always check how the new photo fits with the previous 6–9 posts before publishing.
Platform-Specific Tips
Instagram Feed
- Use 4:5 ratio — takes up the maximum screen real estate on mobile
- Minimum resolution of 1080px on the main dimension
- Keep important elements away from the edges — the app may clip them in the grid view
- Slightly above-natural brightness and vibrant colors tend to perform better
- Photos featuring people get more engagement — ensure faces are well-lit and sharp
Instagram Stories and Reels
- 9:16 ratio is mandatory — any other ratio gets cropped or padded with black bars
- Keep the top and bottom thirds clear of important elements — the username sits at the top and interaction buttons sit at the bottom
- High saturation and contrast work well — the full-screen vertical format demands immediate visual attention
TikTok
- Same as Stories: 9:16, 1080×1920px
- Thumbnail photos should have the subject clearly centered and readable even at small sizes
- Any text overlay should sit in the center zone of the image, not at the edges
- Use the 2:3 format (1000×1500px) — vertical pins significantly outperform horizontal ones
- The pin title appears below the image — the photo itself needs to be self-explanatory
- Saturated colors and clean composition work best for high-performing pins
Facebook and LinkedIn
- 1.91:1 ratio (1200×630px) for image posts or link cards
- A more professional, neutral tone works better on LinkedIn
- On Facebook, images with less than 20% text area tend to achieve broader organic reach
Checklist: Photo Ready for Social Media

Before posting any photo, confirm:
- ✅ Correct ratio for the platform (4:5, 9:16, 1:1, 2:3...)
- ✅ Minimum 1080px on the main dimension
- ✅ Brightness and contrast adjusted — not too dark, not overexposed
- ✅ Vibrant colors with corrected white balance
- ✅ Filter applied at moderate intensity, consistent with the feed
- ✅ Noise reduced (especially for night or indoor photos)
- ✅ No watermark on the exported file
- ✅ Main subject has enough space not to get cropped in the thumbnail
Supported Export Formats
PhotoEditor.Studio accepts and exports the main image formats:
- JPEG — Smallest file size
- PNG — Lossless quality
- WEBP — Web standard 2026
- GIF — Simple images
PhotoEditor.Studio vs Other Social Media Editing Tools
| Feature | PhotoEditor.Studio | Canva | VSCO | Lightroom Mobile |
|---|---|---|---|---|
| 100% Free | ✅ Always | ⚠️ Limited | ⚠️ Freemium | ⚠️ Freemium |
| No Watermark | ✅ Always | ❌ Paid | ❌ Paid | ✅ Yes |
| Full crop ratios | ✅ All | ✅ All | ⚠️ Limited | ✅ All |
| Local processing (private) | ✅ Full | ❌ Server | ❌ Server | ⚠️ Cloud |
| Batch Editing | ✅ Free | ⚠️ Paid | ❌ No | ⚠️ Paid |
| No Sign-up Required | ✅ None needed | ❌ Required | ❌ Required | ❌ Required |
Frequently Asked Questions About Editing Photos for Social Media
What is the ideal Instagram photo size in 2026?
For the feed, the most recommended format is 4:5 (1080×1350px) — portrait orientation that takes up the most screen space. For Stories and Reels, use 9:16 (1080×1920px). For square posts, 1:1 (1080×1080px).
Instagram compresses photos on upload. Is it worth editing in high resolution?
Yes. Instagram compresses everything, but the final quality depends partly on the quality of what you upload. The better the photo you send, the less noticeable the compression. Always export at a minimum of 1080px and use high-quality JPEG or WEBP.
Is it better to use preset filters or adjust manually?
Depends on your goal. Preset filters are faster and ensure consistency when you use the same one every time. Manual adjustments give you more control but require more time and skill to keep consistent. The ideal combination: pick a base filter and make small manual tweaks to adapt it to each specific photo.
Can I edit for Stories and Feed in the same editor?
Yes. In PhotoEditor.Studio, just change the crop ratio: 9:16 for Stories and 4:5 for the Feed. You can create both versions from the same original photo in a single session.
How many photos can I edit per day?
There's no limit. You can edit, export, and use as many photos as you want — no daily or monthly restrictions, completely free.
Does the editor work on mobile so I can edit right before posting?
Yes. PhotoEditor.Studio is fully responsive and works in mobile browsers on Android (Chrome) and iOS (Safari). You can edit and export the photo on your phone before opening Instagram to publish.
Ready to Transform Your Social Media Photos?
Try it now and see the difference the right edit makes to your feed.
Open Free Photo Editor →